Recent Mad Traveller
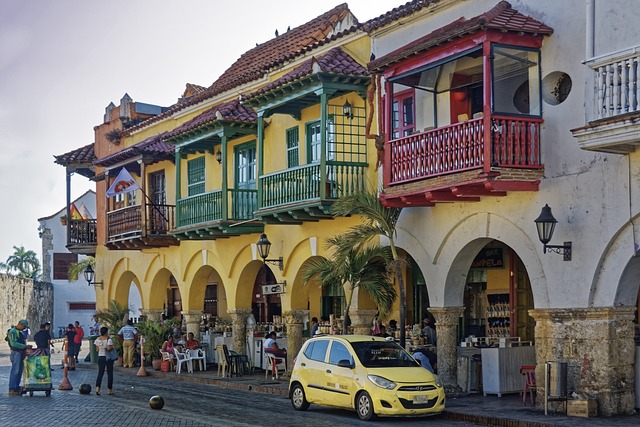
Cartagena 2 Day Itinerary (Old City First)
Two days here is Walled City orientation on arrival, then Castillo San Felipe and La Popa monastery on day two. That is the whole plan, and it should be: at this length, skip the day trips entirely rather than rushing one. Want the deeper Getsemani history thread and a market day added on? See the Cartagena 4 day itinerary , or read the full Cartagena guide first.
Book these before you go
read more
Cartagena 3 Day Itinerary (No Tourist Traps)
Three days adds one thing back that the 2 day version has to cut: Volcan del Totumo. The spine is the same, arrival and the walls, then the Rosario Islands, with the mud volcano slotted in as a lighter third day. Shorter plan? See the 2 day itinerary . More time? See the 5 day or 7 day versions.
Book these before you go
Book a Rosario Islands tour , 159,000 COP adult / 139,000 COP child, plus a...
read more
Cartagena 3 Day Itinerary (Old City First)
Three days keeps the same Walled City and Castillo San Felipe spine as the 2 day itinerary and adds a full Getsemani day, murals, plaza nightlife, and the neighborhood’s Afro-Colombian history. Want a market day and a chiva bus night too? Move up to the 4 day itinerary , or start with the Cartagena guide for the full picture.
Book these before you go
Book a Castillo San Felipe tour , 38,000...
read more
Cartagena 4 Day Itinerary (No Tourist Traps)
Four days keeps the same spine, arrival, the Rosario Islands, Volcan del Totumo, and adds La Boquilla as a lighter fourth day away from Bocagrande’s crowds. Shorter plan? See the 3 day itinerary . More time? See the 6 day or 7 day versions.
Book these before you go
Book a Rosario Islands tour , 159,000 COP adult / 139,000 COP child, plus a 25,000 to 29,000 COP dock tax not always included.
read more
Cartagena 4 Day Itinerary (Old City First)
Four days keeps the same spine as the 3 day itinerary , Walled City, Castillo San Felipe, Getsemani, and adds a market-and-nightlife day rather than rushing straight to a day trip out of town. Ready for San Basilio de Palenque too? Move up to the 5 day itinerary , or read the Cartagena guide first for the full context.
Book these before you go
Book a Castillo San Felipe tour , 38,000 to 50,000 COP...
read more
Cartagena 5 Day Itinerary (No Tourist Traps)
Five days keeps arrival, the Rosario Islands, Volcan del Totumo, and La Boquilla, then adds a fifth day for Bocagrande’s practical convenience and a chiva party bus night. Shorter plan? See the 4 day itinerary . More time? See the 6 day or 7 day versions.
Book these before you go
Book a Rosario Islands tour , 159,000 COP adult / 139,000 COP child, plus a 25,000 to 29,000 COP dock tax not...
read more
Cartagena 5 Day Itinerary (Old City First)
Five days keeps the same Walled City, Castillo San Felipe, Getsemani, and market spine as the 4 day itinerary and adds the one day trip actually worth taking from a history-first Cartagena trip: San Basilio de Palenque. Want Bocagrande and a second Getsemani night too? Move up to the 6 day itinerary , or read the Cartagena guide first.
Book these before you go
Book a Castillo San Felipe tour ,...
read more
Cartagena 6 Day Itinerary (No Tourist Traps)
Six days keeps the full five-day spine, arrival, the Rosario Islands, Volcan del Totumo, La Boquilla, Bocagrande and a chiva night, then adds San Basilio de Palenque as a sixth day: the deeper, more culturally substantive pick over a second beach day. Shorter plan? See the 5 day itinerary . More time? See the 7 day version .
Book these before you go
Book a Rosario Islands tour , 159,000 COP adult...
read more
Cartagena 6 Day Itinerary (Old City First)
Six days keeps the same Walled City, Castillo San Felipe, Getsemani, market, and Palenque spine as the 5 day itinerary and adds a lower-key beach half-day plus a second, more relaxed Getsemani night rather than a second history-heavy day trip. Want a full seven-day version with a slow departure morning? See the 7 day itinerary , or start with the Cartagena guide .
Book these before you go
Book a...
read more
Cartagena 7 Day Itinerary (No Tourist Traps)
Seven days keeps the full six-day spine, arrival, the Rosario Islands, Volcan del Totumo, La Boquilla, Bocagrande, a chiva night, and San Basilio de Palenque, then adds a genuine flex day before departure. Shorter plan? See the 6 day itinerary . Want the walled-city version instead? See the Cartagena, Colombia 7 day itinerary .
Book these before you go
Book a Rosario Islands tour , 159,000 COP...
read more
Cartagena 7 Day Itinerary (Old City First)
Seven days keeps the same Walled City, Castillo San Felipe, Getsemani, market, Palenque, and Bocagrande spine as the 6 day itinerary and adds one slow morning rather than a second day trip; at a week, resisting the urge to fill every hour is the actual upgrade. Prefer something shorter? Start from the Cartagena guide and work down.
Book these before you go
Book a Castillo San Felipe tour , 38,000...
read more
Cartagena Beaches: Worth It? An Honest Look
Cartagena’s own beach, Bocagrande, is mediocre, gray-brown sand facing a shipping channel, not the Caribbean postcard the hotel brochures imply. The actual marquee sights sit offshore or up the coast: the Rosario Islands, Playa Blanca on Isla Baru, the Totumo mud volcano, and La Boquilla’s beach clubs. Ranked honestly, most of it earns the trip. Some of it, particularly the boat-day...
read more
Cartagena Islands: 8 Things Worth Doing
Cartagena runs on Colombian pesos and Caribbean heat, not the spring-like climate Medellin gets from its mountain altitude. Expect 30 to 32C most days, humidity that makes the walled city feel hotter than the thermometer says, and a rate that trades around 3,236 to 3,263 COP to the dollar, close enough that you should check it again before you fly. The Old City earns one day. The water around it...
read more
Cartagena: 9 Things Actually Worth Doing
Cartagena runs on Colombian pesos, and the rate moves enough to matter: mid-2026 sits around 3,236 to 3,263 COP per dollar, verify the same-day number before you land rather than trusting a figure from last year’s guide. This is not Medellin’s spring-like altitude city. Cartagena sits at sea level on the Caribbean and runs 30 to 32C with real humidity, year-round, and dry season...
read more
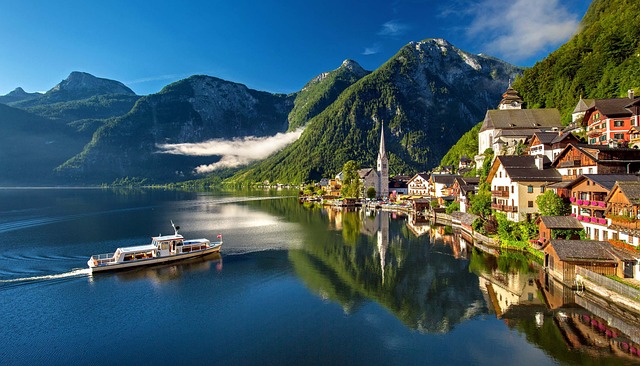
Austria 2 Day Itinerary (No Tourist Traps)
Two days buys you Vienna, not Austria, and every generic itinerary that also crams in a Salzburg day trip is setting you up badly: that is five hours of OBB Railjet for maybe three hours in a city that deserves an overnight. Austria runs on the euro and its cities connect by excellent OBB rail, but this plan never leaves Vienna, so there is no vignette to buy and no train to book.
read more
Austria 3 Day Itinerary (No Tourist Traps)
Three days is Vienna plus one real day trip, not Vienna plus a rushed Salzburg blitz. Austria runs on the euro and OBB Railjet connects its cities well, but a Salzburg round trip alone eats five of your remaining twenty-four hours; the Wachau valley, closer and cheaper, pays off better. Go April to May or October for mild weather and thinner crowds. Only have two days? Drop the Wachau and see our...
read more
Austria 4 Day Itinerary (No Tourist Traps)
Four days is our 3-day plan plus one night in Salzburg instead of returning to Vienna. Austria runs on the euro, and the OBB Railjet covers Vienna to Salzburg in roughly 2 hours 22 minutes; skip renting a car for this leg entirely, since a vignette and Salzburg parking cost more than the train and solve a problem you do not have. Go April to May or October for the mildest weather.
read more
Austria 5 Day Itinerary (No Tourist Traps)
Five days is our 4-day plan plus a second Salzburg night, which buys you a genuine Salzkammergut lakes day instead of a rushed one. Austria runs on the euro, OBB Railjet covers the Vienna-Salzburg leg in roughly 2 hours 22 minutes, and you will not touch a motorway or a vignette anywhere on this route. Go April to May or October for thinner crowds; Hallstatt specifically is worse in July and...
read more
Austria 6 Day Itinerary (No Tourist Traps)
Six days is our 5-day plan plus Innsbruck and the Alps instead of a rushed trip home from Salzburg. Austria runs on the euro, and this whole loop, Vienna to the Wachau to Salzburg to Innsbruck, connects entirely by OBB Railjet; you never need a car or a motorway vignette unless you specifically want to drive the seasonal Grossglockner High Alpine Road, which this itinerary does not attempt. Go...
read more
Austria 7 Day Itinerary (No Tourist Traps)
Seven days is our 6-day plan plus a real second day in Innsbruck instead of squeezing the Alps into a single afternoon. Austria runs on the euro, and this loop, Vienna to the Wachau to Salzburg to Innsbruck, connects entirely by OBB Railjet with no motorway vignette required, unless you specifically want to drive the seasonal Grossglockner High Alpine Road, which carries its own separate toll and...
read more
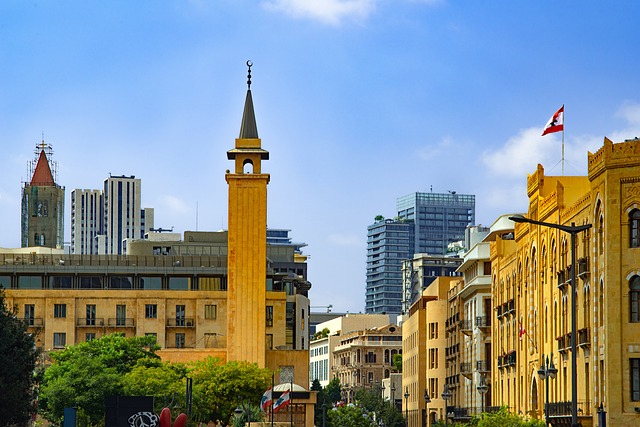
Beirut 2 Day Itinerary (No Tourist Traps)
Two days in Beirut is the Corniche, Downtown and the National Museum, nothing further afield, and nothing here should read as a green light to go right now. This is what those two days look like when your own government’s advisory has cleared and your insurance is in order. Need more time to add the day trips, see our 3-day and 4-day Beirut itineraries, or the full Beirut guide for the whole...
read more
Beirut 3 Day Itinerary (No Tourist Traps)
Three days is our 2-day Beirut plan , the Corniche, Downtown and the National Museum, plus one genuine day trip to Byblos. Nothing here is a go-now plan; it’s what those three days hold for a traveler whose own government’s advisory has cleared and whose insurance is confirmed. Want more day trips worked in, see our 4-day itinerary next.
Before you go:
Check your government’s...
read more
Beirut 4 Day Itinerary (No Tourist Traps)
Four days builds on our 3-day Beirut plan , the Corniche, Downtown, the National Museum and Byblos, then adds Jeita Grotto and Harissa on a fourth day. This is what four days holds for a traveler whose own government’s advisory has cleared and whose insurance is confirmed, not a go-now plan. For the mountains day beyond this, see our 5-day itinerary.
Before you go:
Check your...
read more
Beirut 5 Day Itinerary (No Tourist Traps)
Five days builds on our 4-day Beirut plan , the Corniche, Downtown, the National Museum, Byblos, Jeita Grotto and Harissa, then adds a fifth day in the Chouf mountains. This is what five days holds for a traveler whose own government’s advisory has cleared and whose insurance is confirmed, not a go-now plan. For flex time beyond this, see our 6-day itinerary.
Before you go:
Check your...
read more
Beirut 6 Day Itinerary (No Tourist Traps)
Six days builds on our 5-day Beirut plan , the Corniche, Downtown, the National Museum, Byblos, Jeita Grotto, Harissa and the Chouf, then adds a slower sixth day in Hamra and Achrafieh. This is what six days holds for a traveler whose own government’s advisory has cleared and whose insurance is confirmed, not a go-now plan. For a full week, see our 7-day itinerary.
Before you go:
Check your...
read more
Beirut 7 Day Itinerary (No Tourist Traps)
Seven days is our full 6-day Beirut plan , the Corniche, Downtown, the National Museum, Byblos, Jeita Grotto, Harissa, the Chouf, Hamra and Achrafieh, plus one final flex day before you fly. This is what a full week holds for a traveler whose own government’s advisory has cleared and whose insurance is confirmed, not a go-now plan. For the shorter version, see our full Beirut guide or the...
read more
Beirut: 7 Things Worth Doing (and 3 to Skip)
Beirut sits at US State Department Level 4, Do Not Travel, the same tier as active conflict zones, and Washington ordered non-emergency staff out on 23 February 2026. The UK’s FCDO advises against all travel to Dahieh, the south, the Bekaa and Baalbek-Hermel, Akkar and northern Tripoli, and every Palestinian camp, and against all but essential travel to the rest of Beirut and Mount Lebanon....
read more
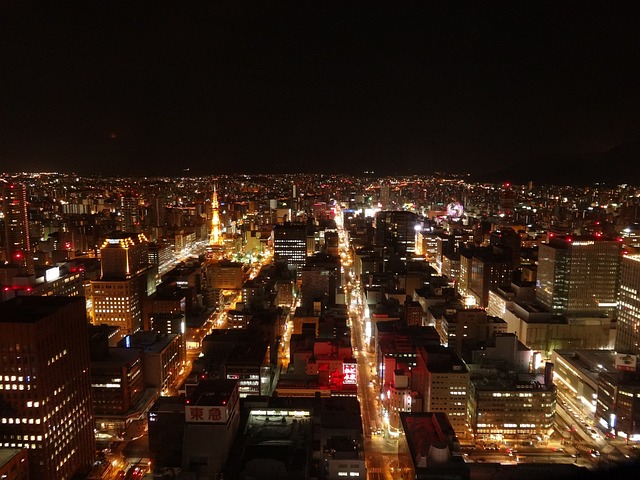
Sapporo 2 Day Itinerary (No Tourist Traps)
Two days in Sapporo is Odori Park, Susukino’s ramen, and the Mt Moiwa night view, and nothing else. That’s the honest version: Otaru, a ski day, and Jozankei onsen all need a third day minimum, and pretending otherwise just means a rushed, worse version of everything. If you have more time, our 3-day and 7-day plans build outward from this exact core.
Book these before you go:
Your...
read more
Sapporo 3 Day Itinerary (No Tourist Traps)
Three days is our 2-day core (Odori, Susukino, Mt Moiwa) plus a full third day for the Sapporo Beer Museum, Nijo Market properly, and Maruyama’s park and shrine. It’s still not enough time for Otaru or a ski day; those start at 4 days .
Book these before you go:
Your Odori or Station-area hotel : non-negotiable months out if any date lands in Snow Festival week (4-11 Feb 2026) Mt Moiwa...
read more
Sapporo 4 Day Itinerary (No Tourist Traps)
Four days is our 3-day plan (Odori, Mt Moiwa, the Beer Museum, Maruyama) plus a full day trip to Otaru, the first day this trip has room for a genuine change of scenery. A ski or onsen day still needs 5 days minimum.
Book these before you go:
Your Odori or Station-area hotel : the priority booking if any date lands in Snow Festival week (4-11 Feb 2026) Mt Moiwa Ropeway tickets : pre-book peak...
read more
Sapporo 5 Day Itinerary (No Tourist Traps)
Five days is our 4-day plan (Odori, Mt Moiwa, the Beer Museum, Otaru) plus one more day: a Niseko or Rusutsu ski day in winter, or a Jozankei onsen day any time of year. It’s the first length on this list with room for Hokkaido’s actual second draw, not just central Sapporo.
Book these before you go:
Your Odori or Station-area hotel : the priority booking for Snow Festival week (4-11...
read more
Sapporo 6 Day Itinerary (No Tourist Traps)
Six days is our 5-day plan (Odori, Mt Moiwa, the Beer Museum, Otaru, a ski or onsen day) plus a genuinely flexible sixth day: more of Susukino’s food scene, a Yoichi whisky detour from Otaru, or, in summer, Furano’s lavender fields. Compare it against our 7-day plan if you can stretch one more day for a Niseko overnight instead of a day trip.
Book these before you go:
Your Odori or...
read more
Sapporo 7 Day Itinerary (No Tourist Traps)
Seven days is our 6-day plan (Odori, Mt Moiwa, the Beer Museum, Otaru, a ski or onsen day, a flex day) plus one more day, which is genuinely enough slack to turn Day 5’s ski day into a Niseko overnight instead of a rushed round trip. Shorter on time? Our 2-day core covers just Odori, Susukino, and Mt Moiwa.
Book these before you go:
Your Odori or Station-area hotel : the priority booking for...
read more
Sapporo: 9 Things Worth Doing (Skip 3)
Most Sapporo guides open with a shinkansen photo. Skip that fantasy: the bullet train stops at Shin-Hakodate-Hokuto, hundreds of kilometers south, and won’t reach Sapporo until around FY2038. Fly into New Chitose instead, ride the 37 minute JR Rapid Airport train for 1,430 yen, and spend your planning energy on what actually matters here: whether to build the trip around February’s...
read more

Madagascar 2 Day Itinerary (No Traps)
Heads up: some links here are affiliate links. Book or buy through them and we may earn a small commission at no extra cost to you. We only point you to things we would actually use.
Two days in Madagascar buys you exactly one thing beyond the capital: a single wildlife walk at Andasibe-Mantadia, three hours each way on the RN2. That’s it. If you want more of the country, our 3 day version...
read more
Madagascar 3 Day Itinerary (No Traps)
Heads up: some links here are affiliate links. Book or buy through them and we may earn a small commission at no extra cost to you. We only point you to things we would actually use.
Three days is the shortest length where Andasibe-Mantadia stops being a rushed dash and becomes a proper overnight, which changes the whole trip. This is Tana plus one region, done at a reasonable pace, not a...
read more
Madagascar 4 Day Itinerary (No Traps)
Heads up: some links here are affiliate links. Book or buy through them and we may earn a small commission at no extra cost to you. We only point you to things we would actually use.
Four days is Tana plus Andasibe (see the 3 day version for that core) plus one option: a long single-day push south on the RN7 to Antsirabe and back. It’s an honest add-on, not a comfortable one.
read more
Madagascar 5 Day Itinerary (No Traps)
Heads up: some links here are affiliate links. Book or buy through them and we may earn a small commission at no extra cost to you. We only point you to things we would actually use.
Five days is the 4 day route with one real improvement: instead of a brutal same-day dash to Antsirabe, you get an overnight there, which is a genuinely better trip for one extra day. This is still Tana, Andasibe and...
read more
Madagascar 6 Day Itinerary (No Traps)
Heads up: some links here are affiliate links. Book or buy through them and we may earn a small commission at no extra cost to you. We only point you to things we would actually use.
Six days takes the 5 day route (Tana, Andasibe, Antsirabe) and keeps going: instead of turning back at Antsirabe, you push six more hours down the RN7 to Ranomafana’s rainforest. The honest cost is Day 6, which...
read more
Madagascar 7 Day Itinerary (No Traps)
Heads up: some links here are affiliate links. Book or buy through them and we may earn a small commission at no extra cost to you. We only point you to things we would actually use.
Seven days takes the 6 day route (Tana, Andasibe, Antsirabe, Ranomafana) and pushes one stage further down the RN7 to Isalo’s sandstone canyons. Read the honest fine print before you book: this itinerary does...
read more
Madagascar: 7 Things Worth Doing
Heads up: some links here are affiliate links. Book or buy through them and we may earn a small commission at no extra cost to you. We only point you to things we would actually use.
Madagascar is not a side trip. It is a standalone, long-haul island roughly the size of France, priced in Malagasy ariary (MGA), and covered almost entirely by lemurs, chameleons and baobabs rather than anything...
read more
Madagascar: Worth It? An Honest Look
Madagascar prices everything in ariary (MGA), and the numbers look tame until you remember every national park adds a mandatory guide fee on top of the entrance ticket, cash only, no way around it. Roughly 4,250 to 4,300 MGA buys one US dollar in 2026, so a 45,000 MGA entrance fee is not the bargain it looks like once a flight, a driver-guide and a few nights get added. There are no lions or...
read more
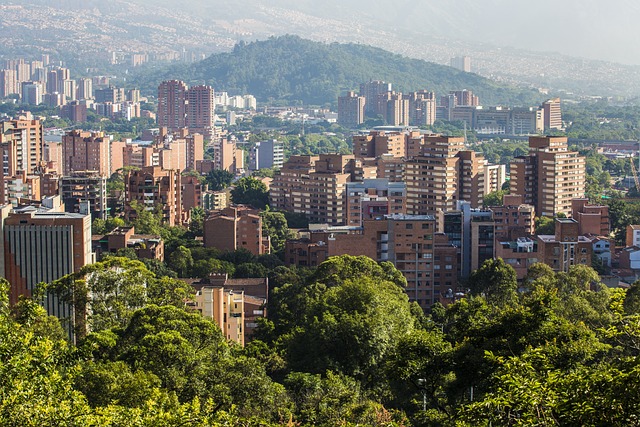
Medellin 2 Day Itinerary (No Tourist Traps)
Two days is enough for the honest highlights, not the whole city. Day one pairs a guided Comuna 13 tour with Plaza Botero and Centro; day two is the full Guatape and El Penol day trip. There is no room left for Parque Arvi or a coffee finca, do not try to force them in. Need more time? See the 3 day , 5 day or 7 day versions of this same route.
read more
Medellin 3 Day Itinerary (No Tourist Traps)
Three days adds one thing back that the 2 day version has to cut: the Metrocable ride to Parque Arvi. The spine is the same, Comuna 13 and Centro, then Guatape, with the cable car and forest reserve slotted in between. This is the shortest version of this itinerary that does not feel rushed. Shorter plan? See the 2 day itinerary . More time? See the 5 day or 7 day versions.
read more
Medellin 4 Day Itinerary (No Tourist Traps)
Four days is where a proper arrival day earns its place ahead of the same three-day spine: Comuna 13 and Centro, the Metrocable to Arvi, then Guatape. No rushing off the plane straight into a guided tour. Shorter version? See the 3 day itinerary . Want a coffee finca day added on? Take the 5 day version.
Book these before you go
Book a Comuna 13 guided tour , 80,000 to 120,000 COP for 3 to 4...
read more
Medellin 5 Day Itinerary (No Tourist Traps)
Five days is the first version with room for a coffee finca day, added on top of the four day spine: arrival, Comuna 13 and Centro, Metrocable and Arvi, Guatape. Skip Salento and the Valle de Cocora, that landscape sits five to six hours away in a different department entirely and does not belong in a Medellin-only trip. Need less time? See the 4 day itinerary . More? See the 6 day or 7 day...
read more
Medellin 6 Day Itinerary (No Tourist Traps)
Six days takes the full five day spine, arrival, Comuna 13 and Centro, Metrocable and Arvi, Guatape, coffee finca, and adds one flex day in Laureles instead of a sixth forced sight. This is the point where padding an itinerary with a second museum stops making sense; a slower day does more for the trip. Less time? See the 5 day itinerary . One more day? See the 7 day itinerary .
read more
Medellin 7 Day Itinerary (No Tourist Traps)
Seven days is the full circuit: arrival, Comuna 13 and Centro, Metrocable and Arvi, Guatape, a coffee finca, and now two flex days instead of one, Laureles and Envigado. Do not fill the extra day with a second Guatape or a padded museum crawl, Medellin genuinely does not need more sightseeing than this. Shorter? See the 6 day itinerary . This is the longest version in this family.
Book these...
read more
Medellin: 9 Things Actually Worth Doing
Medellin runs on Colombian pesos, and the numbers look alarming until you do the math: a bandeja paisa is 35,000 to 60,000 COP, not “35 to 60.” At 1,495 meters the city sits in permanent spring, 24 to 28C by day, 16 to 18C at night, all year, it is not the tropical coast a near-equatorial map suggests. The “most dangerous city on earth” line is 30 years stale, homicides are...
read more

Moscow 2 Day Itinerary (No Tourist Traps)
Two days is Red Square, the Kremlin, and one more museum, not “all of Moscow.” Every price here is RUB, not euros or dollars, and your foreign Visa or Mastercard will not work anywhere, so arrive with cash exchanged. If three days sounds more honest for your pace, our 3-day plan adds Kitay-Gorod and the Tretyakov without pretending you’ll see either properly in an afternoon...
read more